Connect with us

Tech

The Evolution of Infrastructure as Code: Best Practices and Tools

Published

on

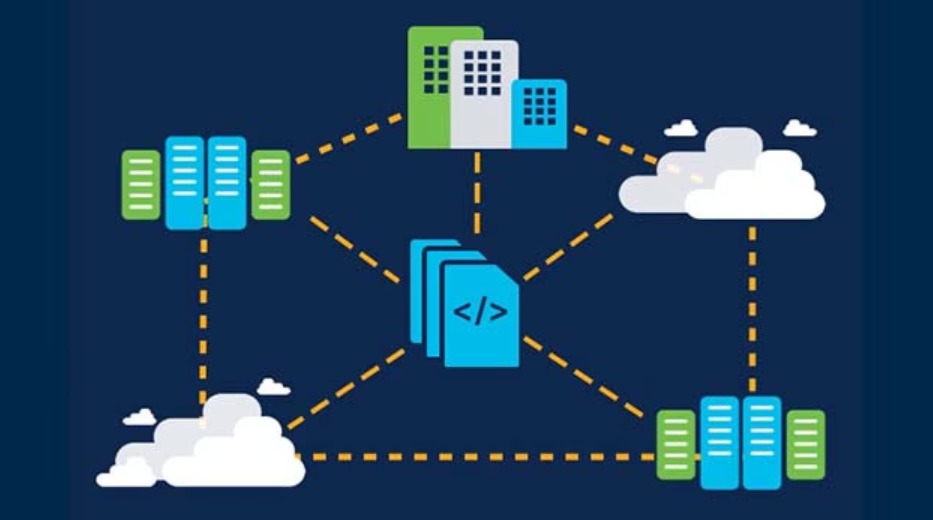
Infrastructure as Code (IaC) represents a fundamental shift in how IT infrastructure is managed and deployed. This paradigm allows you to handle your operational environment similarly to how you manage application code, using machine-readable definition files instead of manual configuration or physical hardware adjustments. This evolution has introduced numerous benefits, enabling more consistent, scalable, and efficient infrastructure management. Let’s explore the evolution of IaC, its best practices, and the essential tools that facilitate its implementation.

The Evolution of Infrastructure as Code

Initially, managing IT infrastructure was a manual, labour-intensive process. System administrators configured each server individually, which was not only time-consuming but also prone to errors and inconsistencies. As the complexity and scale of IT environments grew, this manual approach became unsustainable.


Scripts emerged as an early solution, automating repetitive tasks and configurations. However, as environments scaled, managing these scripts became increasingly difficult. Scripts often lacked standardization, were hard to track, and frequently resulted in configuration drifts and undocumented changes.


The concept of IaC emerged from the need to apply software development principles to infrastructure management. IaC enables the use of version control systems, continuous integration/continuous deployment (CI/CD), and automated testing for infrastructure, ensuring consistency, reliability, and scalability. Instead of manually configuring servers, administrators can now define the desired state of their infrastructure using code, which can be stored, versioned, and managed just like any other source code.

Best Practices for Implementing Infrastructure as Code

Implementing IaC effectively requires adherence to several best practices:

● Version Control Everything:

Just as with application code, all infrastructure definitions and configurations should be stored in a version control system. This allows teams to track changes, roll back configurations, and collaborate more effectively. Tools like GitHub and GitLab are widely used for this purpose.

● Modularize Your Code:

Breaking down your infrastructure code into reusable, modular components enhances maintainability and scalability. This approach enables different teams to manage and deploy their components independently, promoting a more efficient workflow.

● Automate Testing and Validation:

Automated tests should be used to validate infrastructure code before deployment. This ensures that any changes meet predefined standards and do not introduce errors. Continuous integration tools like Jenkins can be configured to run these tests automatically.

● Use Immutable Infrastructure:

Whenever possible, adopt an immutable infrastructure approach, where servers are never modified after deployment. Instead, new configurations are applied by deploying new instances with the updated settings. This reduces the risk of configuration drifts and simplifies rollback procedures.

● Implement Continuous Monitoring:

While IaC can streamline infrastructure management, it’s crucial to implement continuous monitoring to ensure the infrastructure remains compliant and performs as expected. Tools like Prometheus and Grafana can be used to monitor and visualize infrastructure performance.

Essential Tools for Infrastructure as Code

Several tools have become integral to the successful implementation of IaC, each serving different aspects of the process:

● Configuration Management:

Tools like Ansible, Puppet, and Chef automate the configuration and management of infrastructure, allowing you to define the state of your systems in code and apply these configurations consistently across all servers.

● Provisioning:

Terraform and AWS CloudFormation are popular tools for provisioning infrastructure. They allow you to define infrastructure as code using a declarative approach, ensuring that the desired state of your infrastructure is consistently achieved.

● Containerization and Orchestration:

Docker and Kubernetes play a crucial role in managing containerized applications. They eliminate the need for configuration management tools by enabling the deployment and management of containers across multiple environments.

● CI/CD:

Jenkins, GitLab CI, and CircleCI facilitate the continuous integration and deployment of infrastructure changes. These tools automate the process of testing and deploying infrastructure code, ensuring that changes are applied consistently and reliably.

Conclusion

The evolution of Infrastructure as Code has transformed how IT infrastructure is managed, bringing software development practices to the realm of infrastructure. By adhering to best practices such as version control, modularization, automated testing, and continuous monitoring, organizations can reap the full benefits of IaC. Utilizing essential tools like Ansible, Terraform, Docker, and Jenkins further streamlines the process, making infrastructure management more efficient and scalable. As IaC continues to evolve, it will undoubtedly play a pivotal role in the future of IT infrastructure management wukong778 .

Continue Reading
Click to comment

Leave a Reply

Your email address will not be published. Required fields are marked *

Tech

Best AI Face Swap Tools of 2025

Published

on

In the ever-evolving world of digital creativity, AI face swapping has become one of the most exciting tools for content creators, video editors, and social media enthusiasts. From funny memes to professional video production, these tools make it possible to switch faces with incredible realism and ease. As technology continues to advance in 2025, users now have access to faster, smarter, and more accurate AI-driven face swap tools than ever before.

Below is a list of the top AI face swap tools of 2025, carefully reviewed for quality, user experience, and innovation.

1. Magic Hour – The Ultimate Face Swap Experience

When it comes to blending fun with flawless precision, Magic Hour easily takes the top spot. Its advanced AI engine creates realistic and seamless results that even professionals can rely on. Whether users are making short clips for social media, editing marketing content, or experimenting for entertainment, Magic Hour makes the process simple and fast.

What sets it apart is its deep-learning algorithm that adapts to lighting, angles, and facial expressions. Even beginners find it easy to use just upload the images, and the AI does all the heavy lifting. The final output looks astonishingly natural.

Users can try the Face Swap feature directly on Magic Hour’s website. It’s quick, secure, and optimized for both mobile and desktop experiences. No steep learning curve, no expensive software just stunning, professional-quality results in seconds.

2. Reface App – Fun and Fast Mobile Option

ReFace has been a fan favorite for years, especially for quick, fun face swaps on social media. It allows users to create funny videos, GIFs and memes with celebrity faces with just a few taps. While its accuracy isn’t as advanced as Magic Hour, its speed and ease of use make it perfect for casual users who want instant entertainment.

The app regularly updates its content library, allowing users to swap trending movie clips, music videos and memes. It’s more of a creative toy than a professional editing suite, but its accessibility earns it second place on the list.

Top 5 Benefits of Using AI Face Swap Tools

  1. Save Time and Effort
    Traditional photo or video editing can take hours, but AI-powered face swap tools complete the job in seconds. Users no longer need advanced editing skills to achieve professional-quality results.
  2. Boost Creativity
    These tools unlock endless creative possibilities from fun social media posts to professional visual storytelling. Artists, marketers, and creators can experiment freely without worrying about technical limits.
  3. Enhance Realism
    The latest AI systems in 2025 create smoother transitions, match lighting automatically, and maintain natural expressions. This makes every swap look far more realistic than older editing methods.
  4. Accessible to Everyone
    Whether you’re a professional editor or a casual user, today’s AI face swap tools are incredibly user-friendly. Most platforms work directly in browsers or on mobile devices with no setup required.
  5. Encourage Safe Experimentation
    These AI tools allow people to experiment with creative ideas safely, without manipulating real people’s identities in harmful ways. Ethical, consent-based use is encouraged and supported by leading platforms.

3. DeepSwap – Professional AI Video Swapping

For those looking for something more advanced, DeepSwap is a suitable option. It focuses on video switching instead of just images. With its advanced GPU-powered technology, it can transform faces throughout video scenes while maintaining expression and realism.

The tool’s web interface is simple, and the results are surprisingly intuitive. It also supports batch processing, which is useful for creators working on multiple clips at once. However, due to the processing power required, DeepSwap’s plans can be a bit more expensive than casual apps.

4. FacesLab – Reliable AI Photo Editor

FacesLab has been gaining popularity in 2025 as an all-around AI photo enhancement tool. It offers not only face swapping but also background editing, makeup simulation, and age transformation effects. It’s an ideal pick for influencers who want to improve their selfies or visual content without diving into complex editing tools.

FacesLab’s AI filters are designed to look natural rather than exaggerated. It also features strong privacy protection, ensuring users’ photos aren’t stored or shared after editing.

5. Zao – Real-Time AI Swapping for Entertainment

Originating from Asia, Zao continues to impress with its real-time video editing capabilities. Users can insert their faces into iconic movie scenes, TV shows, or music videos within seconds. The app’s AI adapts expressions remarkably well, though it may not always match professional tools in fine details.

Zao’s intuitive design makes it appealing for short-form video creators who want quick, viral-ready results. However, some regions still face limited access due to privacy regulations, which keeps it from ranking higher.

Why AI Face Swap Tools Are Taking Over in 2025

The rise of AI face swapping tools is changing the digital content landscape. What previously required expert editing and hours of work can now be done in seconds. Content creators, influencers, filmmakers, and regular users use these tools to experiment with humor, storytelling, and marketing in innovative ways.

By 2025, AI models will become more accurate in understanding depth, light and emotion. This means smoother transitions, fewer errors and an overall more realistic appearance. As these technologies continue to mature, face swapping is moving from simple entertainment to a legitimate tool in professional video production.

AI Lip Sync Tools: Bringing Characters to Life

Beyond just swapping faces, creators are now pairing their visuals with AI-powered voice and motion tools. The most impressive advancement in this space is AI Lip Sync technology, which syncs mouth movements perfectly with audio, creating life-like digital performances.

The Lip Sync feature from Magic Hour stands out as a leader in this field. It’s designed to work seamlessly with the Face Swap tool, allowing users to animate their creations with believable speech and emotion. This combination is revolutionizing how people produce music videos, animated films, and marketing clips.

From content creators to teachers making educational videos, AI Lip Sync tools are unlocking new creative frontiers with minimal effort and cost.

The Future of AI-Driven Creativity

2025 marks a turning point in how creators interact with digital content. AI-powered tools like Magic Hour are no longer just news they’re essential tools for storytelling, branding, and communication.

In the near future, users can expect even greater integration between AI tools: automatic background adjustments, real-time 3D animation, and cross-platform editing capabilities. These advances will continue to make high-level production easier for everyone, not just professionals.

Final Thoughts

AI tools are redefining creativity. Whether for fun, education, or professional work, the best AI face swap tools of 2025 make it easy to create captivating visual content. Among them, Magic Hour clearly leads the way with its unmatched blend of innovation, realism, and user-friendly design.

FAQs

1. Why is Magic Hour considered the best AI face swap tool in 2025?

Magic Hour stands out for its advanced deep-learning AI that adjusts lighting, angles, and facial expressions automatically. It produces realistic results that even professionals admire. Whether for social media clips or marketing videos, it delivers flawless face swaps in just seconds.

2. Can AI face swap tools be used for professional video projects?

Yes, tools like DeepSwap are built for creators who work on video content. They can replace faces throughout entire scenes while keeping expressions natural. These tools save time, reduce editing costs, and are becoming popular among video editors and marketers.

3. Which AI app is best for fun and quick face swaps?

If you want something easy and entertaining, Reface and Zao are great options. Both allow users to insert their faces into trending clips and memes within seconds. They’re perfect for making funny, shareable content on TikTok, Instagram, and other social platforms.

4. Are AI face swap tools safe and private to use?

Yes, most modern platforms like Magic Hour and FacesLab protect user privacy. They don’t store or share your images once editing is done. Still, users should use these tools responsibly and always avoid creating misleading or harmful content.

5. What’s the future of AI face swapping after 2025?

AI technology is moving toward even more realistic and creative features. Future tools will combine face swapping, AI lip sync, and 3D animation for full video creation. This will make digital storytelling easier, faster, and more lifelike for everyone.

Continue Reading

Tech

Breaking Free from Airport SIM Card Chaos: Your Asia Travel Connectivity Revolution

Published

on

Breaking Free from Airport SIM Card Chaos

Picture this: You’ve just landed at Bangkok’s Suvarnabhumi Airport after a 15-hour flight. You’re exhausted, jet-lagged, and desperate to message your hotel about your arrival. But first, you need to navigate the crowded airport, find a legitimate SIM card vendor among dozens of options, wait in line, fumble with a safety pin to open your SIM tray, and hope the card actually works. Now imagine skipping all of that entirely and having instant connectivity the moment you turn off airplane mode. Welcome to the eSIM revolution that’s transforming how travelers stay connected across Asia.

The traditional airport SIM card ritual has been a rite of passage for international travelers for decades. We’ve all been there—comparing prices at different booths, trying to communicate data needs across language barriers, and dealing with the anxiety of whether we chose the right plan. For frequent travelers across multiple Asian countries, this process multiplies with each border crossing. Travel eSIM Asia solutions have emerged as the game-changing alternative that eliminates these headaches while often providing better coverage and value than traditional options.

Why Asia Demands a Different Connectivity Strategy

Asia isn’t just another travel destination—it’s a vast, incredibly diverse region spanning dozens of countries, each with unique telecommunications infrastructure, regulations, and pricing structures. What works perfectly in Singapore might be completely different from what you need in rural Vietnam or the Indonesian archipelago. This complexity is exactly why traditional single-country SIM cards often fall short for multi-destination travelers.

The region presents unique connectivity challenges that don’t exist elsewhere. In Southeast Asia alone, you might visit Thailand, Vietnam, Cambodia, Malaysia, and Singapore in a two-week trip. Historically, this meant buying a new SIM card at each border, losing your previous number, and repeating the entire setup process. The cost adds up quickly, as does the time spent dealing with these logistics when you’d rather be exploring.

Asian countries also vary wildly in their mobile network quality and coverage. Japan and South Korea boast some of the world’s fastest and most reliable networks, while parts of Indonesia, the Philippines, and Myanmar can be more challenging. Bali e SIM options, for instance, need to account for the island’s specific infrastructure, which differs significantly from mainland Indonesia. Understanding these nuances helps you choose the right connectivity solution for your specific itinerary.

How eSIM Technology Actually Works

Before diving into why eSIM is perfect for Asian travel, let’s clarify what this technology actually is and how it differs from traditional SIM cards. An eSIM is a digital SIM embedded directly into your device’s hardware. Instead of a physical card you insert and remove, it’s reprogrammed remotely with your carrier information. Think of it as downloading your phone service rather than installing a physical component.

This isn’t just a minor convenience upgrade—it’s a fundamental shift in how mobile connectivity works. Your device can store multiple eSIM profiles simultaneously, meaning you can have your home carrier’s eSIM, a regional Asian eSIM, and a country-specific eSIM all ready to go. You can switch between them in your phone’s settings without touching any physical cards or using tools to open SIM trays.

The activation process is remarkably simple. After purchasing an eSIM plan online, you receive a QR code via email. You scan this code with your phone’s camera, confirm the installation, and within minutes, you’re connected. This can happen before you even leave home, meaning you land with working data service immediately. No airport hunting, no line waiting, no language barriers, no possibility of receiving a defective SIM card.

The Real Advantages Beyond Convenience

While the convenience factor is obvious, the benefits of eSIM technology for Asian travel extend far deeper than just avoiding airport SIM card booths. Let’s explore the advantages that truly make a difference during your journey.

Dual SIM functionality without physical limitations: Most modern eSIM-compatible phones can run your physical home SIM and an eSIM simultaneously. This means you can keep your home number active for important calls and messages (often via WiFi calling or for emergency access) while using your eSIM for local data. You’re never truly disconnected from home, yet you’re not paying international roaming rates.

Instant connectivity at each destination: Whether you’re island-hopping in Indonesia or doing a circuit from Tokyo to Seoul to Taipei, you don’t need to find a store or kiosk at each new airport. Your eSIM can cover multiple countries, or you can have several country-specific eSIMs ready to activate. This is particularly valuable when arriving late at night or in smaller regional airports where mobile service options are limited.

Better rates than hotel WiFi or international roaming: Hotels across Asia often charge premium rates for WiFi or offer frustratingly slow free connections. International roaming through your home carrier can cost astronomical amounts—sometimes $10-15 per day or more. eSIM plans typically offer better value, with regional Asian plans often covering multiple countries at a fraction of traditional roaming costs.

Network flexibility and backup options: Because you can store multiple eSIM profiles, you can have backup connectivity options. If one network has poor coverage in a specific area, you can switch to another eSIM that uses a different local carrier. This redundancy is impossible with traditional single SIM cards unless you carry multiple devices.

Environmental and practical benefits: No plastic SIM cards means no waste to dispose of or lose. You also don’t need to keep track of your original home SIM card in a tiny adapter or worry about it falling out of your wallet during your trip. Everything is digital, backed up, and recoverable if needed.

Navigating Asia’s eSIM Landscape by Region

Asia’s size and diversity mean that eSIM strategies vary significantly depending on where you’re traveling. Let’s break down different approaches for different regions and travel styles.

East Asia (Japan, South Korea, China, Taiwan, Hong Kong): This region has exceptional mobile infrastructure and high eSIM adoption. Japan and South Korea particularly benefit from high-speed 5G networks that eSIM plans can leverage. China presents unique challenges due to internet restrictions and firewall considerations—some eSIM providers offer plans with VPN functionality built in, which is crucial for accessing Google, Instagram, WhatsApp, and other blocked services.

For East Asian travel, country-specific eSIMs often provide the best speeds and coverage, especially if you’re staying in one country for an extended period. However, multi-country East Asian plans work well for circuit trips like a Japan-Korea-Taiwan itinerary. The key is ensuring your plan includes adequate high-speed data before throttling, as you’ll likely use more data than expected with such fast networks available.

Southeast Asia (Thailand, Vietnam, Singapore, Malaysia, Philippines, Indonesia, Cambodia, Laos, Myanmar): This is where multi-country eSIM plans truly shine. The region’s interconnectedness and common travel circuits make regional plans incredibly practical. eSIM for Asia packages that cover 8-10 Southeast Asian countries are particularly popular and cost-effective for backpackers and digital nomads doing regional trips.

Coverage quality varies more in Southeast Asia than East Asia. Major cities like Bangkok, Singapore, Kuala Lumpur, and Ho Chi Minh City have excellent networks, but rural and island areas can be spotty. For island destinations like Bali, Koh Samui, or Boracay, check specifically which networks your eSIM uses in those locations—not all carriers have equal coverage in resort and tourist areas.

South Asia (India, Sri Lanka, Nepal, Bangladesh): South Asian eSIM options are growing but still less developed than other Asian regions. India, with its massive market, has decent eSIM availability, though coverage and reliability can vary significantly between regions. For India travel, starting with a smaller data package and refilling if needed is often smarter than committing to a large upfront plan, as network performance can be unpredictable outside major cities.

Central Asia and Special Regions: Countries like Kazakhstan, Uzbekistan, Mongolia, and Tibet present unique connectivity challenges. eSIM availability is limited, and in some cases, traditional SIM cards remain the more reliable option. Always research current options for these destinations specifically rather than assuming regional plans will cover them.

Choosing the Right eSIM Plan for Your Trip

Not all eSIM plans are created equal, and choosing the right one requires understanding several key factors beyond just price and data quantity.

Coverage vs. countries listed: A plan might advertise coverage in 15 Asian countries, but the quality and network partners vary dramatically. Check which specific networks the eSIM uses in your primary destinations. For example, a plan might work on Vietnam’s Viettel network in one country but use a smaller carrier in another, affecting your real-world experience.

Data speeds and throttling policies: Many eSIM plans offer “unlimited” data but throttle speeds after a certain threshold—often 1-5GB per day. For most travelers, this is adequate for maps, messaging, social media, and light browsing. However, if you’re planning to work remotely, stream content, or upload large photo/video files, you need either a higher threshold or unthrottled plans. Read the fine print about what speed you’ll get after hitting daily or total limits.

Validity periods and rollover: Some eSIM plans are calendar-based (e.g., 30 days from activation), while others are usage-based (e.g., 7GB whenever you use it). For intermittent travelers who might visit Asia multiple times per year, usage-based plans that don’t expire offer better value. Calendar-based plans work better for single extended trips with continuous use.

Top-up and extension options: Check whether you can add more data to your plan if you run out, and how easy that process is. Some providers make it seamless through their app, while others require purchasing an entirely new plan. This flexibility matters if you’re unsure about your data needs or have unpredictable plans.

Customer support and troubleshooting: When you’re halfway across the world and something isn’t working, responsive customer support becomes crucial. Look for providers with 24/7 support, multiple contact methods (chat, email, phone), and good reviews specifically about their support quality. The cheapest plan doesn’t matter if you can’t get help when you need it.

Installation and Setup: Doing It Right

The technical process of setting up an eSIM is straightforward, but getting it right the first time saves headaches during your trip.

Before you leave home: Purchase and install your eSIM plan while you’re still at home with reliable internet and in a stress-free environment. Don’t wait until you’re at the airport or on the plane. Install the eSIM profile but don’t activate it yet—most plans don’t start counting days until you actually turn on the data connection.

Device compatibility check: Not all phones support eSIM technology. iPhone XS and later, Google Pixel 3 and later, Samsung Galaxy S20 and later, and most recent flagship phones include eSIM capability. However, some regions sell phones with this feature disabled, and some carriers lock it. Verify your specific device model supports eSIM and isn’t carrier-locked before purchasing any plan.

Understanding dual SIM settings: Once your eSIM is installed, you’ll need to configure your phone’s dual SIM settings correctly. Decide which SIM handles cellular data (should be your eSIM when traveling), which handles voice calls, and which is your default for messages. You can usually set this to “ask each time” if you want control over each interaction.

Activation timing: Most eSIM plans activate when you first connect to data in the covered region. Turn off cellular data and keep your phone in airplane mode until you’re ready to start using your plan. When you land and are ready to activate, turn on data, select your eSIM for cellular data, and give it a few minutes to connect. You should see a local carrier name appear in your status bar.

Troubleshooting common issues: If your eSIM isn’t connecting, try these steps in order: restart your phone, toggle airplane mode on and off, manually select a network in your carrier settings, remove and reinstall the eSIM profile. Have your provider’s support contact information saved offline before your trip in case you need to reach them.

Real-World Scenarios: When eSIM Saves Your Trip

Let’s look at practical situations where eSIM technology makes a tangible difference beyond theoretical advantages.

The multi-country backpacker: Sarah is doing three weeks across Thailand, Cambodia, Vietnam, and Laos. With traditional SIM cards, she’d need to buy a new one in each country, spending roughly $10-15 per card plus time at each border. Instead, she purchased a single 15GB regional eSIM for $35 that covers all four countries. She’s saved money, countless hours at mobile shops, and hasn’t dealt with a single language barrier around phone service.

The business traveler on a tight schedule: James flies into Singapore for a two-day conference, then continues to Jakarta for client meetings, followed by a weekend extension in Bali. His eSIM activates the moment he lands in Singapore with full coverage across all three destinations. He’s in his Grab ride to the hotel within minutes of landing, already coordinating meetings via WhatsApp. At no point does he waste conference time dealing with connectivity issues.

The digital nomad island hopping: Maria works remotely while exploring Indonesia. She needs reliable, fast connectivity for video calls and file uploads. Her eSIM plan offers 10GB of high-speed data daily across Indonesia’s major carriers. When she discovers the island she’s on has poor coverage with one carrier, she switches to a backup eSIM using a different network—all from her phone’s settings, no shop visit required.

The family vacation coordinator: The Chen family is traveling with two teenagers across Japan and South Korea. Instead of managing four separate SIM cards and topping up for four people, they purchased eSIM plans that can share data or have group management. The parents can monitor usage, top up remotely if needed, and everyone stays connected without complex logistics.

Common Mistakes to Avoid

Even with eSIM’s simplicity, certain mistakes can derail your connectivity. Here’s what to watch out for:

Activating too early: The single most common mistake is turning on data roaming or connecting to a network before you intend your plan to start. Many plans begin their countdown the moment you first use data, not when you install the eSIM. Keep data turned off until you’re actually in your destination and ready to use the plan.

Ignoring physical SIM options entirely: While eSIM is fantastic, it’s not perfect for every situation. Some remote areas have limited eSIM support, and occasionally technical issues arise. Carrying your phone’s original SIM card as a backup costs nothing and provides peace of mind. Some travelers even keep a physical SIM tray adapter with emergency credit as absolute backup.

Assuming all eSIMs cover all areas equally: An eSIM advertising coverage in “Indonesia” might work perfectly in Jakarta and Bali but have no coverage whatsoever in Raja Ampat or other remote regions. If you’re visiting less touristy areas, verify specific coverage for those locations, not just the country overall.

Forgetting about WiFi calling and messaging: Your home carrier likely offers WiFi calling and messaging features that work anywhere you have internet. Enable these before traveling so you can still receive calls and texts to your home number even while using your eSIM for data. This is particularly important for two-factor authentication codes and other important messages.

Not testing before critical needs: Install and test your eSIM while you still have backup internet options. Don’t wait until you desperately need directions to your hotel at 11 PM in an unfamiliar city to discover there’s a setup issue. Test it at the airport or during your first activity when connectivity is important but not critical.

The Future of Travel Connectivity in Asia

eSIM technology is still evolving, and the Asian market is at the forefront of this evolution. We’re seeing trends that will shape travel connectivity over the next few years.

Increasing carrier adoption: More Asian carriers are offering eSIM support directly, sometimes at competitive rates to third-party providers. Countries like Singapore, Japan, and South Korea lead this trend, with Southeast Asian nations following. This increased competition drives down prices and improves service quality.

Embedded travel services: Future eSIM plans will likely bundle additional travel services—lounge access, attraction discounts, transportation deals—making them more comprehensive travel solutions rather than just connectivity products. Some providers are already experimenting with loyalty programs and partner benefits.

Improved global vs. regional plans: As eSIM infrastructure matures, we’re seeing better global plans that include Asian countries without sacrificing coverage quality. This is particularly relevant for travelers who visit Asia as part of broader world trips rather than dedicated Asian itineraries.

5G expansion and requirements: As 5G networks expand across Asia, data needs and expectations are growing. Future eSIM plans will need to support these faster networks and higher data consumption patterns, particularly as augmented reality travel apps and high-quality video sharing become standard.

Frequently Asked Questions

Can I use eSIM if my phone is carrier-locked?

If your phone is carrier-locked, you typically cannot use eSIM services from other providers, even for international travel. Carrier locks are applied by your home carrier and restrict your device to their network only. Before traveling, contact your carrier to request an unlock (usually available after your contract obligation is fulfilled) or check if they offer international eSIM solutions. Some carriers allow eSIM use for international travel even on locked devices, but this varies by carrier and country.

What happens to my eSIM when I return home?

Your eSIM profile remains on your device when you return home, but it stops working once you leave the coverage area or the plan expires (depending on the plan type). You can keep the eSIM profile installed without any issues—it won’t interfere with your home SIM or cost you anything while inactive. If you plan to return to Asia, keeping the profile installed means you can simply reactivate or top up the same eSIM without reinstalling. If you want to remove it, you can delete the eSIM profile in your device settings at any time.

How much data do I actually need for a two-week Asia trip?

Data needs vary widely based on usage patterns, but here’s a general guide: For light use (messaging, maps, occasional social media with photos), 1-2GB per week is usually sufficient. Moderate use (regular social media, video calls, streaming music, frequent map use) typically requires 3-5GB per week. Heavy use (video streaming, large file uploads, constant hotspot use for other devices, working remotely) can easily consume 1-2GB daily. Most travelers fall in the moderate use category, so 6-10GB for two weeks is a safe starting point. If you plan to upload photos/videos regularly or work remotely, aim for 15-20GB or plans with daily high-speed allotments.

Can I share my eSIM connection with travel companions?

Yes, you can use your phone’s hotspot feature to share your eSIM connection with travel companions or other devices like laptops and tablets. However, be aware that most eSIM plans explicitly prohibit or limit hotspot usage in their terms of service, and using hotspot typically consumes data much faster than using it only on your phone. Some providers offer dedicated plans or add-ons specifically for hotspot use if you need this feature regularly. Also note that hotspot functionality drains your phone’s battery quickly, so bring a portable charger if you plan to use this feature frequently.

What if my eSIM stops working mid-trip?

First, try basic troubleshooting: restart your phone, toggle airplane mode, check that the correct eSIM is selected for cellular data in your settings, and verify you haven’t exceeded your data limit or validity period. If issues persist, contact your eSIM provider’s support team—most reputable providers offer 24/7 support via chat, email, or phone. As a backup, you can always purchase a physical SIM card from a local store or enable WiFi calling on your home carrier to at least maintain communication while resolving the issue. This is why having your eSIM provider’s support contact details saved offline before your trip is crucial.

The shift from physical SIM cards to eSIM technology represents more than just technological progress—it’s a fundamental reimagining of how we stay connected while exploring the world. For Asia travelers in particular, where diverse countries, varying infrastructure, and complex logistics have always complicated connectivity, eSIM solutions eliminate longstanding pain points. Whether you’re backpacking through Southeast Asia, conducting business in East Asian capitals, or seeking digital nomad adventures across the continent, understanding and leveraging eSIM technology transforms your travel experience from the moment you land to the moment you return home. The days of airport SIM card chaos are ending, replaced by instant, flexible, reliable connectivity that actually enhances your journey rather than complicating it.

More Posts

Video&A 2025: Revolutionizing the Future of Interactive Video Technology


What is Janitor AI? Features, Use Cases & How to Use It Safely in 2025

Continue Reading

Tech

Mastering Amazon SES with Gmail: Practical Steps, Best Practices, and Real-World Use Cases

Published

on

Mastering Amazon SES with Gmail: Practical Steps, Best Practices, and Real-World Use Cases

Amazon Simple Email Service (SES) is a scalable, cost-effective solution for sending email from applications. Integrating SES with Gmail—whether you’re sending from a Gmail address, receiving via Gmail, or using Gmail as your email client while SES handles sending—can unlock reliable deliverability, tighter security, and better analytics. This guide provides practical, evidence-backed steps to configure SES with Gmail, common pitfalls, and actionable tips you can implement today.

What is Amazon SES?

Amazon SES is a cloud-based email sending service designed for developers and businesses. It provides:

  • Scalable sending infrastructure
  • Built-in reputation and deliverability features (SPF, DKIM, DMARC)
  • Flexible integration options (SMTP, API, and AWS Console)
  • Cost efficiency for high-volume email

SES can be used to send transactional messages (order confirmations, password resets) and marketing emails, with powerful monitoring and analytics.


Why Combine SES with Gmail?

Using SES in conjunction with Gmail can offer several advantages:

  • Improved deliverability for transactional and marketing emails sent from your applications.
  • Gmail as a familiar email client for composing and monitoring messages.
  • Centralized management of credentials and SMTP settings.
  • Enhanced security with IAM-based access and rotating SMTP credentials.

Note: Gmail is used here as the client for sending via SES SMTP. SES handles the actual dispatch, while Gmail provides the interface you’re comfortable with.


Planning Your SES-Gmail Integration

Before you start, plan your configuration to avoid delays and deliverability issues.

Choose your sending method

  • SMTP interface: Simple to set up with Gmail’s SMTP settings, suitable for lightweight needs.
  • SES API: Best for application-level sending with higher throughput and richer analytics; requires code changes.
  • Hybrid approach: Use SES API for backend sending and Gmail/SMTP for administrative emails or for testing.

For Gmail users who want a straightforward setup, SMTP is typically the quickest path.

Verify domains and identities

  • Domain verification: Verifies you own the domain and allows you to send from any address at that domain.
  • Email identity: Verifies a single email address. Useful for testing or if you only need to send from one address.

Domain verification is usually preferred for long-term flexibility.

Set up DNS records

To establish trust and deliverability, you’ll add DNS records:

  • SPF: Authorizes SES to send on behalf of your domain.
  • DKIM: Signs messages to prevent tampering and improve deliverability.
  • MX records (if you plan to receive): Optional unless you enable SES receiving.

If you already use SES with AWS, you’ll manage these records in your domain’s DNS host.

Warm up your sending IPs

If you’re using dedicated IPs, ramp up gradually to build and protect your sender reputation:

  • Start with low volumes
  • Gradually increase over weeks
  • Monitor bounce rates and complaint rates

Warming is less critical if you stay within SES’s shared pool and maintain good practices.


Step-by-Step Setup Guide

Follow these steps to connect Gmail to SES via SMTP and start sending from your Gmail interface.

1) Verify a Domain or Email Identity

  • Sign in to the AWS Management Console and open Amazon SES.
  • Choose Identity Management > Domains (or Email Addresses).
  • If verifying a domain:
    • Click Verify a New Domain.
    • Enter your domain (e.g., example.com) and choose Verify This Domain.
    • Add the provided DNS TXT record to your domain’s DNS.
    • Optionally enable DKIM (Amazon SES can generate CNAME records for DKIM).
  • If verifying an email address:
    • Add the email address (e.g., mail@example.com) and complete verification via the email link you receive.

Verification can take a few minutes to several hours depending on DNS propagation.

2) Request Production Access

By default, SES accounts begin in the SES sandbox, which restricts sending to verified addresses only. To send to unverified recipients and gain higher sending limits, you must request production access.

  • In the SES console, submit a request to move out of the sandbox.
  • Provide details: your use case, sending type (transactional/marketing), estimated volume.
  • Once approved, you’ll receive production access with higher sending limits.

3) Configure DKIM and SPF

  • SPF: Add an SPF TXT record to authorize SES to send on your domain’s behalf. Example value:
    • v=spf1 include Amazonses.com ~all
  • DKIM: In the SES console, enable DKIM for your domain. SES provides CNAME records that you must add to DNS.
  • After DNS propagation, verify that DKIM is active in the SES console.

4) Create SMTP Credentials

  • SES uses IAM credentials to authenticate SMTP access.
  • In the AWS Management Console:
    • Go to IAM > Users > (Your SES User) > Security credentials.
    • Create SMTP credentials (this creates an IAM user and corresponding SMTP password).
  • Note the SMTP endpoint for your region (e.g., email-smtp.us-east-1.amazonaws.com) and the port (25, 587, or 2587 for TLS).

5) Connect Gmail to SES via SMTP

Option A: Using Gmail as the client

  • Open Gmail and go to Settings > See all settings > Accounts and Import.
  • Add another email address you own:
    • Name: Your Name
    • Email address: an address verified in SES (e.g., noreply@example.com)
    • SMTP Server: email-smtp.us-east-1.amazonaws.com
    • Port: 587 (TLS) or 25
    • Username: your SES SMTP username (the one created in IAM)
    • Password: the corresponding SMTP password
    • Require TLS: Yes
  • Verify ownership if prompted (Gmail may send a confirmation email to the SES-verified address).
  • Set the new SMTP address as default if desired, and configure reply-to address as needed.

Option B: Sending from Gmail using SES as the underlying SMTP

  • If you want to send emails from Gmail’s UI but route through SES, the above steps apply. Emails will appear to recipients as coming from your SES-verified domains or addresses.

Notes and caveats:

  • Gmail’s SMTP relay will send via SES, but you’ll be subject to SES sending limits until you’re out of sandbox and beyond basic limits.
  • Ensure the “From” address you configure in Gmail aligns with a verified identity in SES. The envelope-from (Return-Path) will be managed by SES.

6) Optional: Receiving Email with SES

If you also want to receive email via SES and have it delivered to an S3 bucket, SNS, or Lambda:

  • In SES, configure a receipt rule set.
  • Add an action to deliver to the destination (S3, Lambda, or SNS).
  • Create MX records in your DNS to point to SES receiving endpoints.
  • Use Gmail or another client to fetch or forward received messages if needed (via Gmail’s own forwarding or POP/IMAP).

If you mainly need Gmail for reading inbound mail, you can also set up Gmail to fetch from another mailbox, but that is separate from SES.


Deliverability Best Practices

To maximize deliverability when sending via SES and viewing/archiving in Gmail:

  • Maintain good sender reputation:
    • Keep bounce rates low (aim for <1% initially, then under 0.1% for high volume).
    • Minimize complaint rates (below 0.01% if possible).
  • Authenticate properly:
    • SPF and DKIM must be correctly configured and propagated.
    • Enable DMARC to protect your domain and improve deliverability.
  • Segment send types:
    • Use dedicated IPs for high-volume or important transactional emails.
    • Separate transactional from marketing emails to protect reputations.
  • Content quality:
    • Avoid spammy language, deceptive subject lines, or misleading content.
    • Include clear unsubscribe options for marketing emails.
  • Rate limiting and warm-up:
    • If using dedicated IPs, gradually increase sending volume.
    • Monitor bounce and complaint feedback loops (FBL) and adjust campaigns accordingly.
  • Monitoring:
    • Use SES metrics, CloudWatch, and SES sending statistics to track deliverability.
    • Regularly review bounce reasons and recipient engagement.

Common Pitfalls and Troubleshooting

  • Sandbox restrictions:
    • If you’re in the SES sandbox, you can only send to verified addresses. Request production access to scale.
  • Verification delays:
    • DNS propagation may take time; ensure TXT and CNAME records are correctly published.
  • DNS misconfigurations:
    • SPF or DKIM misconfigurations can hurt deliverability. Use online SPF/DKIM validators to confirm.
  • SMTP authentication issues:
    • Ensure you use the correct SMTP username (not your AWS console password) and the generated SMTP password.
  • From vs. envelope-from mismatches:
    • SES uses the Return-Path (envelope-from) controlled by SES. Ensure your Gmail settings align with verified identities.
  • Gmail limitations:
    • Gmail may impose sending limits per day for external SMTP relays; stay within those limits or upgrade through SES

Real-World Use Cases

  • Startups sending transactional emails (order confirmations, password resets) from a domain, while using Gmail as the day-to-day email client for internal communications.
  • SaaS platforms delivering high-volume transactional emails with SES’s scalable infrastructure, with staff using Gmail for monitoring and response templates.
  • E-commerce businesses centralizing communications by sending from a branded domain via SES, while using Gmail for marketing outreach and customer support coordination.

FAQ

  1. Do I need to verify my domain to send via SES with Gmail?
  • Yes. Verifying a domain (preferred) or a specific email identity is required to prove ownership and enable sending.
  1. Can I send marketing emails through SES using Gmail?
  • Yes, but ensure compliance with CAN-SPAM, including clear unsubscribe options. Consider using dedicated IPs and proper segmentation for higher deliverability.
  1. What about SPF and DKIM—do I need to configure them even if I’m using Gmail as the client?
  • Yes. SPF and DKIM must be configured for your domain to ensure trust and deliverability, regardless of the client you use.
  1. Why is my Gmail sending via SES ending up in spam?
  • Possible reasons: poor sender reputation, SPF/DKIM misconfigurations, high bounce/complaint rates, or spammy content. Review authentication records, reduce bounces, and test with small batches.
  1. How do I move out of the SES sandbox?
  • In the SES console, request production access and provide details about your expected sending use case and volume. After approval, you can send to unverified recipients within policy.
  1. Can I use SES API and Gmail together?
  • Yes. Use SES API for back-end sending (apps, services) and Gmail SMTP for manual or administrative emails if desired. They’re compatible and can be used in tandem.
  1. Are there cost considerations I should be aware of?
  • SES pricing is typically per-email sent, plus data transfer. Gmail usage is free up to the limits of your Google Workspace or free Gmail plan. Factor in SMTP relay costs only if you exceed free usage.

Conclusion

Integrating Amazon SES with Gmail can provide the best of both worlds: the reliability and scalability of SES for sending, paired with the familiarity and convenience of Gmail as your email client. By carefully verifying identities, configuring SPF and DKIM, provisioning and securing SMTP credentials, and following deliverability best practices, you can achieve high-precision deliverability, robust security, and streamlined workflows.

If you’re new to cloud-based email sending, start in the sandbox, gradually escalate to production, and monitor results closely. With thoughtful planning and consistent hygiene, SES + Gmail can become a powerful, scalable solution for both transactional and marketing emails.

Continue Reading

Trending