Connect with us

Fashion

Mastering the Art of Curling Hair with the T3 Curling Iron: Tips and Tricks

Published

on

T3 Curling Iron

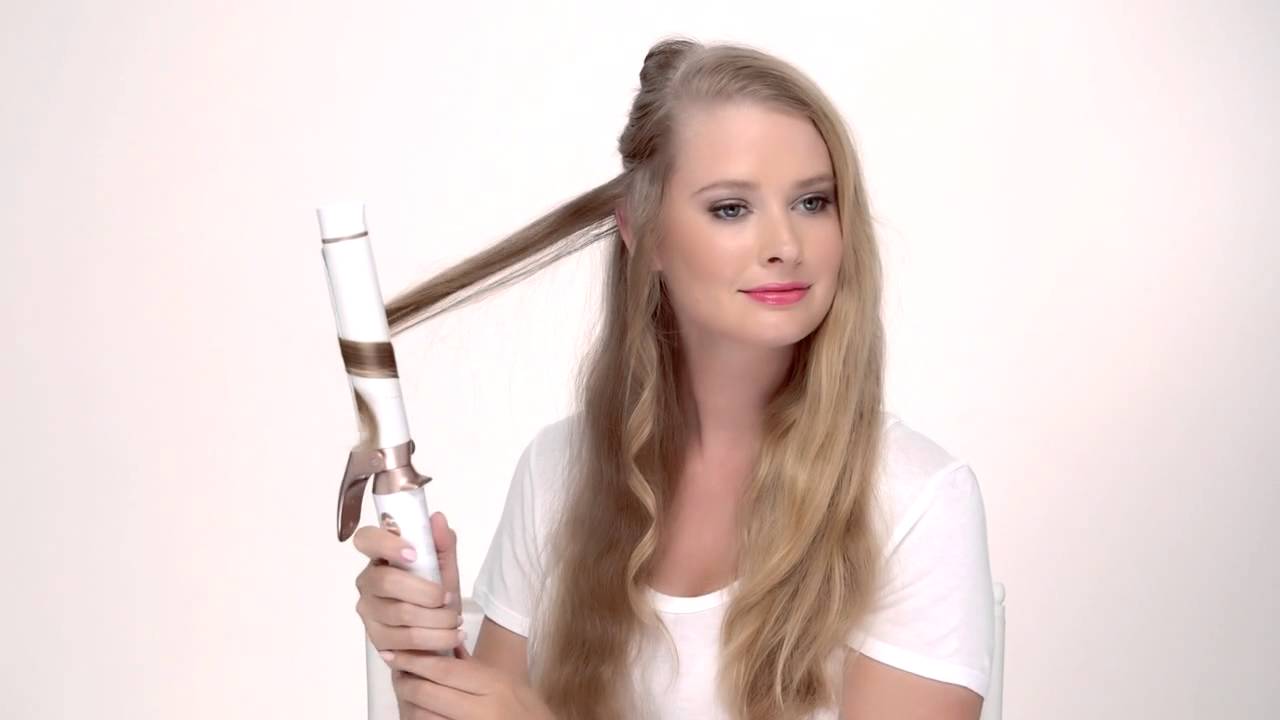
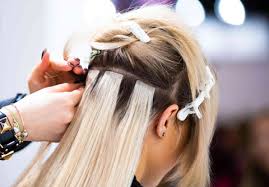
Introduction to the T3 Curling Iron

Welcome to the world of fabulous curls! Whether you’re looking to add some bounce and volume or want to achieve those effortlessly tousled waves, mastering the art of curling hair is a game-changer. And when it comes to achieving picture-perfect curls, one tool reigns supreme – the T3 Curling Iron!

With its innovative technology and sleek design, the T3 Curling Iron has become a favorite among hairstylists and beauty enthusiasts alike. But if you’re new to this styling powerhouse or simply looking for some tips and tricks to take your curl game up a notch, you’ve come to the right place.

In this blog post, we’ll dive deep into all things T3 Curling Iron – from understanding barrel sizes and prepping your hair for curling, to techniques for creating different types of curls and ensuring long-lasting results. We’ll also cover common mistakes to avoid, additional accessories and products that can enhance your styling experience with the T3 Curling Iron, troubleshooting tips, maintenance advice, and even provide some celebrity-inspired styling inspiration.

So grab your favorite cup of coffee (or tea!) as we embark on a journey towards becoming a master at curling hair with the incredible T3 Curling Iron. Get ready to unleash those gorgeous curls that will turn heads wherever you go.

Understanding the Different Barrel Sizes

Understanding the Different Barrel Sizes

When it comes to curling your hair with the T3 Curling Iron, one size does not fit all. The barrel size you choose can greatly impact the type of curls you achieve. It’s important to understand the different options available and how they can enhance your desired look.

Smaller barrels, such as 0.75 inches or 1 inch, are perfect for creating tight and defined curls. These sizes work great for those who want a more polished and structured hairstyle. They are also ideal for shorter hair lengths or if you’re looking to add volume to specific sections of your hair.

On the other hand, larger barrels like 1.5 inches or 2 inches produce looser and more relaxed waves. These sizes are perfect for achieving that effortless beachy vibe or adding natural-looking texture to longer locks.

If you’re looking for versatility, consider a curling iron with interchangeable barrels. This way, you can switch between sizes depending on your mood or occasion.

Remember that every person’s hair is unique, so don’t be afraid to experiment with different barrel sizes until you find what works best for you.

Preparing Your Hair for Curling

Preparing Your Hair for Curling

Before you start curling your hair with the T3 Curling Iron, it’s important to properly prepare your tresses. This will ensure that your curls turn out beautifully and last longer throughout the day.

Make sure your hair is clean and dry before you begin. Washing your hair a day before curling can help add some texture and hold to the curls. If desired, apply a lightweight styling product such as mousse or heat protectant spray to protect your strands from heat damage.

Next, comb through your hair to remove any tangles or knots. This will create a smooth canvas for curling and prevent any snags while using the T3 Curling Iron.

To enhance the longevity of your curls, consider applying a volumizing spray at the roots. This will provide extra lift and body to your hairstyle.

Now it’s time to section off your hair. Divide it into smaller sections using clips or hair ties so that you can easily work on one section at a time with the T3 Curling Iron.

Remember to adjust the temperature setting on the curling iron based on your hair type. Fine or damaged hair may require lower heat settings while thicker or coarser hair may need higher temperatures for effective curl formation.

By following these simple steps of preparing your hair before using the T3 Curling Iron, you’ll be able to achieve stunning curls that last all day.

Techniques for Creating Different Types of Curls

Techniques for Creating Different Types of Curls

Creating different types of curls with the T3 Curling Iron can be a fun and creative way to switch up your hairstyle. Whether you’re going for loose beach waves or tight spiral curls, there are a few techniques you can try to achieve the look you desire.

One technique is to wrap small sections of hair around the curling iron barrel, starting from the root and working your way down towards the ends. Hold each section in place for a few seconds before releasing it. This will create bouncy and voluminous curls.

For looser waves, try using larger sections of hair and wrapping them loosely around the barrel. Leave out the ends for an effortlessly tousled look. If you want more defined curls, twist each section before wrapping it around the barrel.

Another technique is called “the clamp method.” Start by clamping a small section of hair near the roots between the curling iron’s clamp and barrel. Then, rotate the iron away from your face while slowly sliding it down towards the ends. This technique creates beautiful cascading curls that frame your face.

To achieve natural-looking curls, alternate between curling some sections towards your face and others away from your face. This will add dimension and movement to your hairstyle.

Remember to always use heat protectant spray before curling to prevent damage to your hair. And don’t forget that practice makes perfect! Experiment with different techniques until you find what works best for you.

So go ahead, unleash your creativity, and master different types of curls with ease using the versatile T3 Curling Iron.

Tips for Long-Lasting Curls

Tips for Long-Lasting Curls:

1. Use the right products: Start by applying a heat protectant spray to shield your hair from damage caused by the curling iron. Then, use a lightweight mousse or styling cream to add hold and texture to your strands.

2. Section your hair: Divide your hair into smaller sections before curling. This ensures that each section gets enough heat and creates uniform curls. Clip away the sections you’re not working on to keep them out of the way.

3. Adjust the temperature: Different hair types require different temperatures for optimal results. Fine or damaged hair should be curled at lower temperatures, while thicker or coarse hair may need higher heat settings. Experiment with different temperatures until you find what works best for you.

4. Hold each curl longer: After wrapping your hair around the barrel, hold it in place for a few extra seconds before releasing. This helps set the shape and increases longevity.

5. Allow curls to cool completely: Once you’ve curled all sections of your hair, let them cool down completely before touching or brushing them out. This allows the curls to “set” and ensures they last longer throughout the day.

6.

Use hairspray strategically: Finish off with a light mist of flexible-hold hairspray to lock in those beautiful curls without weighing them down or making them stiff.

Remember, practice makes perfect when it comes to mastering long-lasting curls with your T3 Curling Iron.

Common Mistakes to Avoid When Using the T3 Curling Iron

Common Mistakes to Avoid When Using the T3 Curling Iron

Mistake #1: Skipping Heat Protectant
One of the biggest mistakes you can make when using any curling iron, including the T3 Curling Iron, is skipping heat protectant. This vital step helps to prevent damage and keep your hair healthy. Apply a heat protectant spray or serum evenly throughout your hair before styling with the T3 Curling Iron.

Mistake #2: Using Incorrect Temperature Settings
Another common mistake is using incorrect temperature settings on your T3 Curling Iron. It’s important to understand that different hair types require different levels of heat. Fine or damaged hair should use a lower temperature setting, while thicker or coarse hair may need higher heat. Consult the user manual for guidance on appropriate temperature ranges for your specific hair type.

Mistake #3: Holding Hair on the Barrel Too Long
When curling your hair with the T3 Curling Iron, avoid holding each section on the barrel for too long. Overexposure to heat can lead to excessive damage and uneven curls. Aim for no more than 10-15 seconds per section and release gently.

Mistake #4: Neglecting Section Sizes
Achieving beautiful curls with your T3 Curling Iron also requires proper section sizes. If you take large sections of hair, it becomes difficult for the iron to distribute heat evenly, resulting in limp or undefined curls. Opt for smaller sections that are easier to manage and ensure consistent results.

Mistake #5: Not Allowing Curls To Cool Down
After releasing each curl from the barrel of your T3 Curling Iron, give them time to cool down fully before touching or brushing through them. Cooling allows the shape of each curl to set properly and enhances their longevity.

By avoiding these common mistakes when using a T3 Curling Iron, you’ll be well on your way to mastering the art of curling hair and achieving fabulous results every time.

Additional Accessories and Products for Enhanced Results

Additional Accessories and Products for Enhanced Results

To take your curling game to the next level, there are some additional accessories and products that can enhance your results with the T3 Curling Iron. These tools and products are designed to help you achieve salon-worthy curls with ease.

One accessory that can make a big difference is a heat-resistant glove. This glove will protect your hand from burns while allowing you to wrap your hair around the barrel more comfortably. It gives you added control and precision, ensuring that each curl comes out perfectly formed.

Another useful tool is a styling wand attachment. This attachment allows you to create different types of curls by changing the shape of the barrel. You can go from loose beach waves to tight ringlets with just one tool.

When it comes to products, using a heat protectant spray is essential. This spray creates a barrier between your hair and the heat, preventing damage and keeping your locks healthy. Additionally, applying a volumizing mousse or spray before curling can give your hair extra body and hold for long-lasting curls.

Don’t forget about finishing products! A good hairspray will lock in your curls all day without leaving them stiff or crunchy. You can also use a shine serum or oil to add luster and eliminate frizz for an ultra-glamorous finish.

With these additional accessories and products, you’ll be able to maximize the potential of your T3 Curling Iron and achieve stunning results every time you style your hair.

Troubleshooting and Maintenance of the T3 Curling Iron

Troubleshooting and Maintenance of the T3 Curling Iron

Maintaining your T3 Curling Iron is essential for its longevity and optimal performance. Here are some troubleshooting tips to help you address common issues that may arise:

1. Power Issues: If your curling iron is not turning on, check the power source and ensure it is properly plugged in. Also, make sure the outlet is functioning correctly.

2. Heating Problems: If your T3 Curling Iron is not heating up or if the temperature seems inconsistent, check the settings to ensure they are adjusted correctly. It’s also important to clean any product buildup from the barrel as this can affect heat distribution.

3. Frayed Cord: If you notice any fraying or damage to the cord, discontinue use immediately for safety reasons. Contact customer support for assistance with repairs or replacements.

4. Cleaning and Storage: Regularly clean your curling iron by wiping down the barrel with a soft cloth or using a mild cleaning solution. Avoid using abrasive cleaners that could damage its surface. Store your curling iron in a cool, dry place away from direct sunlight to prevent discoloration or warping of materials.

By following these maintenance tips, you can keep your T3 Curling Iron in top shape and enjoy beautiful curls time after time.

Styling Inspiration: Celebrity Looks with the

Styling Inspiration: Celebrity Looks with the T3 Curling Iron

Now that you have mastered the art of curling hair with the T3 Curling Iron and learned all the tips and tricks, it’s time to get inspired by some celebrity looks! Many Hollywood stars rely on their trusted T3 Curling Irons to achieve stunning hairstyles for red carpet events and everyday glam. Let’s take a look at some iconic celebrity looks that you can recreate using your T3 Curling Iron.

1. Blake Lively’ s Beachy Waves: Known for her effortlessly chic style, Blake Lively often rocks gorgeous beachy waves. To achieve this look, start by applying a heat protectant spray to your hair. Then use a medium-sized barrel on your T3 Curling Iron to create loose curls from mid-lengths to ends. Gently tousle your hair with your fingers for that perfectly undone finish.

2. Selena Gomez’s Voluminous Curls: Selena Gomez is no stranger to glamorous curls. To emulate her voluminous hairstyle, begin by blow-drying your hair upside down using a round brush for added lift at the roots. Section off small sections of hair and use a large-barrel attachment on your T3 Curling Iron to create big bouncy curls from top to bottom.

3. Jennifer Aniston’s Sleek Waves: Jennifer Aniston has been an inspiration when it comes to sleek and polished waves. Start by straightening your hair with a flat iron before curling it with a smaller barrel size on your T3 Curling Iron towards the ends only. Brush through gently for soft waves that frame your face beautifully.

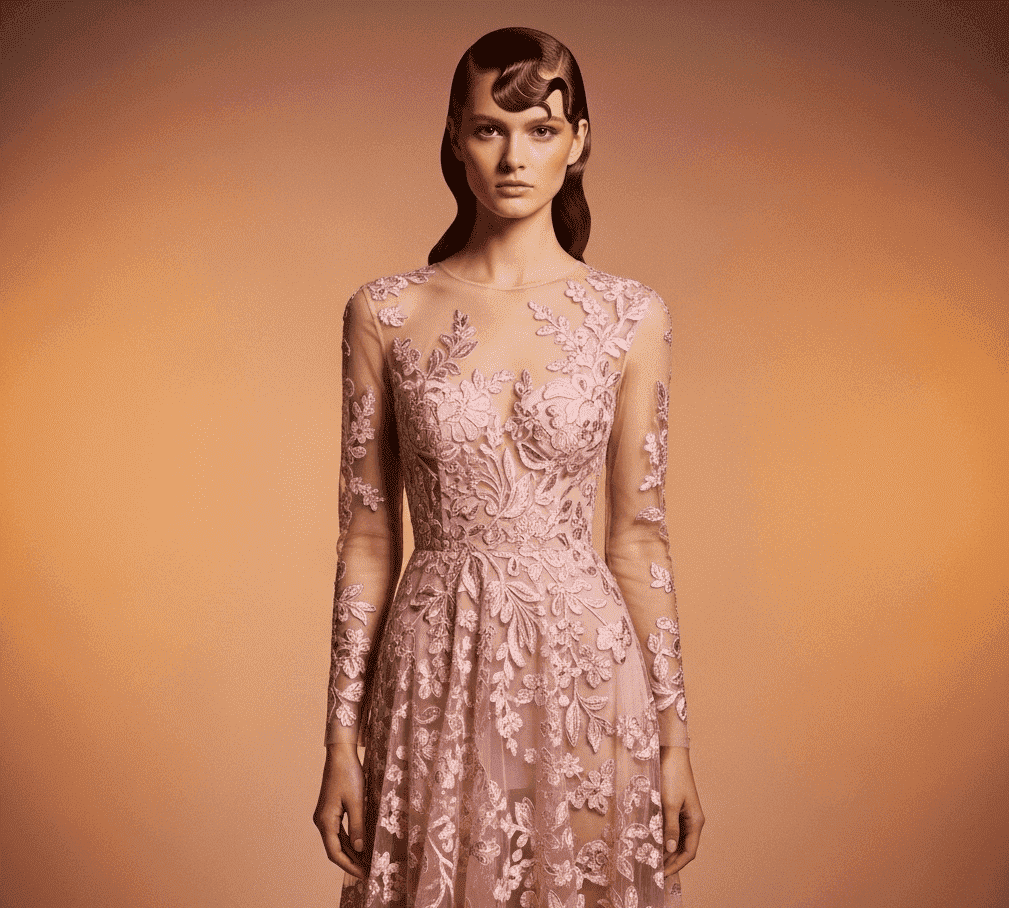
4. Zendaya’s Old Hollywood Glamour: If you’re looking for timeless elegance, take cues from Zendaya’s old Hollywood-inspired curls. Begin by parting dry hair deeply on one side and apply a heat protectant spray throughout. Use a smaller-sized barrel attachment on your T3 Curling Iron and curl small sections of hair.

Fashion

Unlock Your Natural Radiance: 5 Proven Remedies for Glowing Skin at Home

Published

on

5 Proven Remedies for Glowing Skin at Home

In our quest for luminous, healthy skin, the allure of natural remedies often calls to us. The idea of achieving a radiant complexion using ingredients readily available in our kitchens or sourced from nature is both appealing and empowering. While the market is flooded with expensive serums and treatments, glowing skin doesn’t always require a hefty price tag or a complex routine. This article delves into five proven, natural remedies you can easily incorporate into your at-home skincare regimen to unveil your skin’s inherent glow.


The Foundation of a Natural Glow: Understanding Your Skin

Before diving into specific remedies, it’s crucial to understand that “glowing skin” is a multifaceted concept. It signifies skin that is well-hydrated, free from excessive dullness, even in tone, and possesses a healthy barrier function. Factors influencing skin’s appearance include:

  • Hydration: Well-moisturized skin reflects light better, appearing plumper and more luminous.
  • Exfoliation: Removing dead skin cells reveals the fresh, vibrant skin beneath.
  • Nutrition: A balanced diet rich in antioxidants and essential fatty acids supports skin health from within.
  • Circulation: Improved blood flow delivers oxygen and nutrients to skin cells.
  • Protection: Shielding skin from environmental stressors like UV radiation and pollution.

Natural remedies often work by addressing these fundamental aspects of skin health.


5 Proven Natural Remedies for Achieving Glowing Skin

These remedies harness the power of natural ingredients, known for their beneficial properties for the skin. Consistency is key when using natural treatments.

1. The Power Duo: Honey and Yogurt Mask for Brightening and Hydration

Honey, a natural humectant, attracts and retains moisture, making it an excellent ingredient for hydration. Yogurt, particularly plain, unsweetened yogurt containing lactic acid, acts as a gentle exfoliant, helping to slough away dead skin cells and brighten the complexion.

Benefits:

  • Hydration: Honey’s humectant properties draw moisture to the skin.
  • Exfoliation: Lactic acid in yogurt aids in cell turnover.
  • Soothing: Both ingredients have anti-inflammatory properties.
  • Brightening: Helps reduce the appearance of dullness and uneven skin tone.

How to Use:

  1. Mix: Combine 2 tablespoons of plain, unsweetened yogurt with 1 tablespoon of raw honey.
  2. Cleanse: Wash your face thoroughly and pat it dry.
  3. Apply: Apply the mask evenly to your face and neck, avoiding the eye area.
  4. Relax: Leave the mask on for 15-20 minutes.
  5. Rinse: Gently rinse off with lukewarm water and pat your skin dry.
  6. Follow Up: Apply a light, natural moisturizer.

Frequency: Use this mask 1-2 times per week for best results.

2. Revitalizing Exfoliation: Oatmeal and Milk Scrub for Gentle Polishing

Oatmeal is renowned for its soothing and anti-inflammatory properties, making it ideal for sensitive skin. When ground and mixed with milk, it forms a gentle yet effective scrub that buffs away dead skin cells, revealing smoother, brighter skin. The lactic acid in milk complements the exfoliating action.

Benefits:

  • Gentle Exfoliation: Removes dead skin cells without harsh abrasion.
  • Soothing: Calms irritated or inflamed skin.
  • Cleansing: Helps to remove impurities.
  • Smoothens Texture: Leaves skin feeling soft and refined.

How to Use:

  1. Prepare: Grind about 1/4 cup of rolled oats into a fine powder.
  2. Mix: Gradually add enough milk (dairy or non-dairy) to form a thick paste.
  3. Cleanse: Gently cleanse your face and pat dry.
  4. Apply & Scrub: Apply the paste to your face and gently massage in circular motions for 1-2 minutes, focusing on areas prone to dryness or flakiness.
  5. Rest: Leave the paste on for another 5 minutes.
  6. Rinse: Rinse thoroughly with cool water and pat dry.
  7. Moisturize: Apply your preferred natural moisturizer.

Frequency: This scrub can be used 1-2 times per week.

3. The Antioxidant Powerhouse: Turmeric and Chickpea Flour Mask for Radiance

Turmeric is celebrated for its potent anti-inflammatory and antioxidant properties, thanks to its active compound, curcumin. When combined with chickpea flour (besan), it creates a mask that helps fight acne-causing bacteria, reduce redness, and impart a natural radiance. Chickpea flour also aids in cleansing and oil control.

Benefits:

  • Anti-inflammatory: Reduces redness and irritation.
  • Antioxidant: Protects skin from free radical damage.
  • Brightening: Helps fade blemishes and improve skin tone.
  • Cleansing: Chickpea flour helps absorb excess oil.

How to Use:

  1. Mix: Combine 1 teaspoon of turmeric powder with 2 tablespoons of chickpea flour.
  2. Add Liquid: Gradually add milk, yogurt, or rosewater to form a smooth paste. Caution: Turmeric can stain, so use an old towel and be mindful of clothing.
  3. Cleanse: Wash your face and pat it dry.
  4. Apply: Apply the mask evenly, avoiding eyebrows and hairline.
  5. Drying Time: Let the mask dry for about 10-15 minutes.
  6. Rinse: Gently rinse off with lukewarm water, using a soft cloth if necessary.
  7. Moisturize: Follow with a hydrating moisturizer.

Frequency: Use this mask once a week.

4. Hydration and Nourishment: Aloe Vera Gel and Rosewater Mist

Aloe vera is a miracle plant, lauded for its hydrating, healing, and anti-inflammatory properties. When combined with rosewater, a natural toner and anti-inflammatory agent, it creates a simple yet highly effective soothing and hydrating mist that can be used throughout the day.

Benefits:

  • Intense Hydration: Aloe vera is rich in water content.
  • Soothing: Calms sunburn, redness, and irritation.
  • Toning: Rosewater helps balance skin pH.
  • Refreshing: Provides an instant pick-me-up.

How to Use:

  1. Extract: If using a fresh aloe vera leaf, carefully extract the gel, ensuring no latex remains.
  2. Blend: Blend the aloe vera gel with an equal amount of pure rosewater until smooth.
  3. Store: Pour the mixture into a clean spray bottle.
  4. Mist: Close your eyes and spray the mist onto your face from a distance.
  5. Use as Needed: Apply throughout the day to refresh and hydrate your skin.

Frequency: Can be used multiple times daily.

5. Internal Glow: Hydration and Nutrient-Rich Foods

While topical treatments are essential, true glowing skin starts from within. Consuming an adequate amount of water and a diet rich in vitamins, minerals, and antioxidants is paramount for healthy skin.

Key Nutrients and Foods:

  • Water: Essential for overall skin hydration and function. Aim for at least 8 glasses daily.
  • Vitamin C: A powerful antioxidant that aids collagen production.
    • Sources: Citrus fruits, berries, kiwi, bell peppers.
  • Vitamin E: Protects skin from oxidative damage and supports skin health.
    • Sources: Nuts, seeds, spinach, avocado.
  • Omega-3 Fatty Acids: Help maintain the skin’s natural oil barrier, keeping it smooth and hydrated.
    • Sources: Fatty fish (salmon, mackerel), flaxseeds, chia seeds, walnuts.
  • Antioxidants (e.g., Resveratrol, Lycopene): Protect skin cells from damage caused by free radicals.
    • Sources: Grapes, berries, tomatoes, dark chocolate.

Tips for Internal Glow:

  • Start your day with a large glass of water.
  • Incorporate a variety of colorful fruits and vegetables into every meal.
  • Include healthy fats in your diet.
  • Limit processed foods, excessive sugar, and unhealthy fats, which can contribute to inflammation and dullness.

Creating a Holistic Natural Skincare Routine

Achieving and maintaining glowing skin naturally involves a holistic approach that combines external care with internal well-being.

Morning Routine:

  1. Cleanse: Gently cleanse your face with lukewarm water or a mild natural cleanser.
  2. Tone/Mist: Spritz with your Aloe Vera and Rosewater mist.
  3. Moisturize: Apply a lightweight, natural moisturizer.
  4. Protect: If going outdoors, apply a natural sunscreen.

Evening Routine:

  1. Remove Makeup: Use a natural oil cleanser or micellar water.
  2. Cleanse: Wash your face with your usual cleanser.
  3. Treat (Optional): Apply a targeted natural serum or oil.
  4. Hydrate: Apply a richer natural moisturizer.

Weekly Treatments:

  • Incorporate one of the masks or scrubs mentioned above (Honey & Yogurt, Oatmeal & Milk, or Turmeric & Chickpea Flour) once or twice a week.

Consistency and Patience: The Keys to Natural Radiance

It’s important to remember that natural remedies, while effective, often work more subtly and require consistent application over time. Unlike harsh chemical treatments that may offer immediate but temporary results, natural methods focus on improving the overall health and resilience of your skin.

Patience is crucial. Don’t expect overnight transformations. By diligently following a natural skincare routine and maintaining a healthy lifestyle, you will gradually notice a significant improvement in your skin’s texture, tone, and overall luminosity.


Frequently Asked Questions (FAQs)

Q1: How quickly can I expect to see results from natural remedies?

A1: Results vary depending on individual skin type and consistency of use. Typically, you might start noticing subtle improvements within 2-4 weeks of consistent application, with more significant changes visible over 1-3 months.

Q2: Are natural remedies suitable for all skin types?

A2: Generally, yes, but patch testing is always recommended. Ingredients like honey and aloe vera are well-tolerated. For sensitive skin, use gentler exfoliants like finely ground oats and be cautious with turmeric due to its staining potential.

Q3: Can I use these remedies if I have acne-prone skin?

A3: Many natural ingredients, like turmeric and honey, have anti-inflammatory and antibacterial properties that can benefit acne-prone skin. However, always perform a patch test, and avoid over-exfoliating, which can worsen breakouts.

Q4: How should I store homemade natural skincare products?

A4: Store them in airtight containers in a cool, dark place, preferably the refrigerator, especially for masks and mixtures containing fresh ingredients. It’s best to make small batches that you can use within a week or two to ensure freshness and prevent spoilage.

Q5: What is the importance of a patch test?

A5: A patch test helps identify potential allergic reactions or sensitivities to an ingredient. Apply a small amount of the mixture to an inconspicuous area (like behind the ear or on the inner forearm) and wait 24 hours to check for redness, itching, or irritation before applying it to your face.

Q6: Can I combine different natural remedies?

A6: Yes, you can! For instance, you can use the honey and yogurt mask one day and the oatmeal scrub another. However, avoid overdoing it; listening to your skin and not applying too many active ingredients at once is key.


Conclusion: Embracing Your Skin’s Natural Luminosity

Achieving glowing skin naturally at home is an attainable goal that prioritizes health, gentle care, and the potent power of nature. By incorporating these five proven remedies—the hydrating honey and yogurt mask, the gently exfoliating oatmeal and milk scrub, the radiant turmeric and chickpea flour mask, the soothing aloe vera and rosewater mist, and the vital practice of internal nourishment through diet and hydration—you can embark on a journey toward a visibly healthier and more luminous complexion. Embrace patience, consistency, and the inherent beauty that comes from nurturing your skin with the best nature has to offer.

More Posts,

The Ultimate Lip Mousse Guide: Find the Perfect Shade for Every Style

Continue Reading

Fashion

Baby Shower Gifts That Every Mum Will Love – Where Luxury Meets Everyday Use

Published

on

Baby Shower Gifts That Every Mum Will Love

A baby shower is a celebration of life, love, and new beginnings. For many gift-givers, it’s also a moment to express thoughtfulness, warmth, and care for the expectant mum. But with so many baby products available today, the question remains: What kind of gift will truly be appreciated — and used?

In 2025, baby shower gifts are shifting from purely decorative to practical and luxurious. The best gifts are not only aesthetically pleasing but also serve a purpose in the everyday routines of new parents. From beautifully curated baby gift boxes to clever baby care accessories, this guide explores what modern mums truly value — and why brands like BabyWondersUK are making such a strong impression.

What Do New Mums Really Want?

While cute outfits and plush toys are always welcome, new mums increasingly appreciate gifts that simplify life after birth. They want items that are:

  • ✅ Comfortable for the baby

  • ✅ Safe and gentle on newborn skin

  • ✅ Useful beyond the first week

  • ✅ Beautifully presented for the occasion

With sleep-deprived nights and non-stop feeding sessions ahead, a gift that eases daily life — while still feeling special — is one that stands out.

The Rise of Curated Baby Gift Boxes

One of the most popular choices in 2025 is the luxury baby gift set. These pre-packed hampers are loved for their practicality and elegance. Rather than giving one-off items, they offer a full starter kit for new parents, combining quality and style in one ready-to-gift package.

Why They’re So Popular:

  • 📦 Convenience: No need to buy items separately or wrap them

  • 🧸 Consistency: All pieces follow a theme or colour palette

  • 🛏️ Essentials included: Clothes, bibs, swaddles, and more in one box

  • 🎁 Reusable packaging: Boxes often double as keepsake storage

BabyWondersUK is one of the leading UK brands offering such gift sets — and they’ve quickly become a go-to for gift buyers seeking beauty and practicality in one.


Spotlight: BabyWonders Gift Sets

What makes BabyWonders stand out? Their gift sets include between 16 to 28 carefully selected items, making them incredibly versatile and value-packed. Designed in London, their collections are created with both baby and parent in mind.

What’s Typically Inside:

    • 👕 Soft cotton bodysuits and sleepsuits

  • 🧢 Newborn hats, mittens, and socks

  • 🍼 Bibs and burp cloths for feeding

  • 🧼 Muslin swaddles for cuddling and sleep

  • 🧸 Plush toys for early stimulation

  • 💝 Reusable luxury box for keepsakes

Parents love the neutral tones, the silky-soft textures, and the feeling of being truly supported. These are not novelty items — they’re daily-use essentials presented in a way that feels luxurious.

Want to give a gift that truly supports new parents? Browse our curated baby gift collections and see why mums across the UK are loving them.

What Mums Are Saying in 2025

Feedback from new mums is consistent: comfort, practicality, and thoughtful design are what count most. Many say they received duplicate gifts or decorative items that never got used. On the other hand, gifts filled with well-made essentials were deeply appreciated.

Here’s what a new mum shared:

“I got a BabyWondersUK gift set at my shower, and it felt like someone had packed a care package just for me. The quality was incredible, and everything in the box came in handy.”

These gifts aren’t just for the baby — they’re a quiet way to say, “You’ve got this, Mum.”

When to Give a Luxury Baby Gift Set

Baby gift sets from brands like BabyWondersUK are ideal for:

  • 👶 Baby showers – Perfect for creating a wow moment at the party

  • 🍼 Hospital visits – Compact and easy to carry along

  • 💌 First-month celebrations – Great for friends or family visiting baby at home

  • 🧳 Corporate gifts – Thoughtful maternity leave presents for colleagues

Their universal appeal also makes them great for second-time parents who already have the basics but still appreciate fresh, premium-quality clothing and accessories.

Tips for Choosing the Right Baby Shower Gift

When shopping for a gift every mum will love, keep these tips in mind:

1. Choose Baby-Safe Materials

Look for OEKO-TEX® certified fabrics, organic cotton, and chemical-free dyes. A baby’s skin is sensitive and deserves gentle treatment.

2. Pick Gender-Neutral Colours

Unless you know the baby’s gender, soft creams, greys, and pastel tones are always elegant and safe choices.

3. Look for Practical Use

Will the item be used every day? Bibs, bodysuits, muslins, and socks will be reached for constantly.

4. Make It Feel Special

High-quality packaging, coordinated pieces, and gift-ready presentation make a lasting impression.

5. Include a Personal Touch

Some gift sets include customisable name tags or notes. Even if not, adding a handwritten card makes your gesture even more meaningful.


Why BabyWondersUK Is Trending

Social media, mum forums, and online searches all point to one conclusion: curated baby gift sets are more in demand than ever.

BabyWondersUK is gaining attention across platforms like Instagram and Pinterest for its:

  • ✨ Aesthetic presentation

  • 🌿 Sustainable packaging

  • 📦 All-in-one practicality

  • ⭐ Glowing reviews from UK mums

As consumers move away from disposable or novelty gifts, there’s a strong shift toward quality, usability, and emotional connection — all of which BabyWondersUK delivers in spades.

Searching for the best baby gifts this year? Discover our latest baby gift ideas — stylish, practical, and loved by new families.

Safety & Peace of Mind

Parents naturally worry about what touches their newborn’s skin. That’s why every item inside a BabyWondersUK set is made with baby-friendly fabrics and thoughtful design.

For broader newborn care and clothing guidance, refer to trusted UK health sources like the NHS baby care guide.

Final Thoughts: Gift With Heart

Luxury baby shower gifts don’t have to be impractical or expensive for the sake of style. The best presents are those that combine beauty with function, support parents, and reflect genuine thought.

Whether you’re gifting to a first-time mum, a close friend, or a work colleague, a beautifully assembled, high-quality gift set from BabyWondersUK is more than a gift — it’s a gesture of comfort, care, and celebration.

Best Shoes for Neuropathy

Read more trending stories at Space Coast Daily UK.

Continue Reading

Fashion

Casio Is Making a Massive Comeback in 2025 – Here’s Why

Published

on

Casio watchs pic

A Legacy That Refuses to Fade

When you hear the name Casio, you probably picture the classic digital watch you wore as a kid, the indestructible G-Shock, or maybe even the sleek metallic retro style worn by celebrities. Once considered “old school,” Casio is now making one of the biggest comebacks in 2025  and it’s not just a wave of nostalgia.

From Gen Z to longtime collectors, people around the globe are rediscovering the versatility, durability, and affordability that make Casio an iconic name in timekeeping.


💡 Why Is Casio Trending Again in 2025?

Here’s what’s driving Casio’s comeback:

✅ 1. Retro Vibes Are Back in Style

Fashion cycles always repeat and in 2025, retro digital watches are hotter than ever. Influencers on TikTok and Instagram are flaunting classic Casio designs with modern outfits. Models like the Casio F91W and A168WA have become fashion staples once again.

🔥 Casio is now seen on more Gen Z wrists than ever before — even beating some smartwatch brands in certain fashion-forward markets.

✅ 2. Affordable Luxury That Feels Authentic

While other watch brands are pushing sky-high price tags, Casio sticks to its core value: function-first design with budget-friendly pricing. You can still grab a solid, water-resistant, reliable Casio for under £30 and it lasts for years.

Casio gives users a sense of real value unlike trend-chasing wearables that need constant charging or replacement.


⌚ Explore the Best Casio Series in 2025

🛠️ G-Shock: Still the King of Durability

  • Shock-resistant, mud-proof, water-resistant up to 200m

  • Built-in altimeter, barometer, compass (perfect for adventurers)

  • 2025 editions include Bluetooth syncing and solar charging

  • Popular models: G-Shock GA-2100, GW-B5600

🌟 Casio Vintage: Retro Charm Reinvented

  • Iconic square digital faces

  • Metallic silver/gold finishes

  • Slim profile, lightweight

  • Unisex appeal — huge hit in UK, Europe & Asia

  • Popular models: A168, LA680WEA

💼 Edifice: Casio’s Answer to Luxury Watches

  • Chronograph-style analog-digital hybrid

  • Stainless steel casing, sapphire crystal

  • Affordable alternative to Rolex/Omega vibes

  • Popular models: ECB-30, EFS-S580DB


📱 Casio vs. Smartwatches in 2025: The Underdog Wins

Smartwatches are flashy but come with limitations: daily charging, app bloat, software bugs, and short lifespans. Meanwhile, Casio watches run for years on a single battery some models even last 10 years without maintenance.

Casio watches also:

  • Don’t track you (privacy-friendly)

  • Don’t distract you (no constant notifications)

  • Don’t break the bank (huge resale value)

🧠 More users in 2025 are now turning to “dumb tech” for peace of mind — and Casio leads the charge.


🌍 UK & Global Demand Is Rising

Online platforms like Amazon UK, Argos, and WatchShop have reported a 35% increase in Casio watch sales during Q1 2025. The trend is fueled by:

  • TikTok videos tagged with #CasioCore and #RetroWatch

  • Celebrities like Ryan Gosling and Billie Eilish spotted wearing Casio

  • Fashion magazines calling Casio “2025’s surprise trend king”


🔍 Where to Buy Casio in the UK (2025 Edition)

If you’re in the UK, here are the most trusted sources for authentic Casio watches:

Platform Specialty Trusted for
Amazon.co.uk Full Casio range, fast shipping Best variety
Argos Physical + online, limited edition drops Local availability
WatchShop UK Genuine watches, great warranties Premium selection
Casio UK Website Official models only Newest releases

🎁 Top 5 Casio Picks for 2025

Model Style Price (Approx) Why It Rocks
F91W Classic Digital £12 Lightweight, iconic, retro
A168WA Vintage Metal £25 Fashionable, unisex, LED
GA-2100 G-Shock £99 Carbon core guard, sleek design
ECB-30 Edifice Chrono £149 Sporty luxury on a budget
LA680WEA Ladies Retro £29 Compact, trendy, elegant

🔗 Related Articles:


🧠 Final Thoughts: Casio’s Comeback Isn’t Just Nostalgia It’s Practical Style

In a world full of disposable tech, Casio is winning because of simplicity, reliability, and timeless design. Whether you’re a student, a fashionista, or an adventurer there’s a Casio for you in 2025.

The comeback is real and it’s just getting started.

Continue Reading

Trending