Connect with us

Tech

Oprekladač: The Future of Language Translation

Published

on

Oprekladač

In the ever-evolving landscape of technology, one marvel that has consistently captured the imagination of people worldwide is the ability to break down language barriers. Oprekladač, a groundbreaking language translation tool, emerges as a beacon of innovation in this domain. This article delves into the intricacies of Oprekladač, exploring its functionality, benefits, and how it stands out in the crowded field of translation technologies.

Introduction to Oprekladač

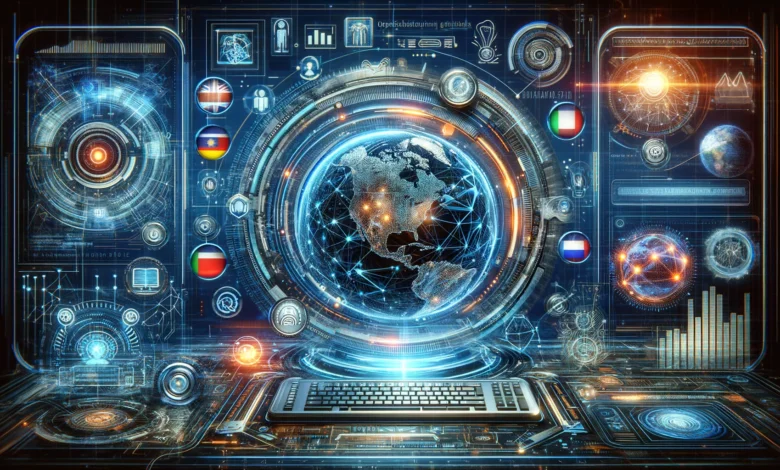
Language serves as the foundation of communication, enabling individuals to share ideas, cultures, and innovations. However, the diversity of languages can also be a formidable barrier. Enter Oprekladač, a sophisticated translation tool designed to transcend linguistic boundaries, making communication seamless and inclusive. This section outlines the core features and the technology behind Oprekladač, setting the stage for a deeper exploration of its capabilities.

Core Features of Oprekladač

Oprekladač is not just another translation tool; it is a comprehensive platform designed for accuracy, speed, and ease of use. The following are its core features:

  • Instant Translation: Provides real-time translation across multiple languages, ensuring efficient communication.
  • Accuracy: Employs advanced algorithms and machine learning techniques to deliver translations with high accuracy.
  • User-friendly Interface: Features a clean, intuitive interface that makes it accessible to users of all tech-savviness levels.
  • Cross-platform Compatibility: Available on various devices and operating systems, ensuring users can access it anytime, anywhere.

How Oprekladač Works

The magic of Oprekladač lies in its sophisticated technology. It utilizes a combination of neural machine translation (NMT) and artificial intelligence (AI) to understand context, grammar, and idiomatic expressions, providing translations that are not only accurate but also convey the intended meaning.

Advantages of Using Oprekladač

Oprekladač stands out for several reasons, not least of which is its ability to make communication effortless across different languages. Here are some advantages:

  • Breaks Down Language Barriers: By providing accurate, real-time translations, it enables users to communicate freely, regardless of their native language.
  • Enhances Learning: It can be a valuable tool for those learning a new language, offering instant translations and examples of real-world usage.
  • Supports Global Businesses: Businesses looking to expand globally can use Oprekladač to communicate with clients and partners in their native languages, building trust and rapport.

Comparison with Other Translation Tools

While there are many translation tools available, Oprekladač differentiates itself through its accuracy, speed, and ease of use. This section compares Oprekladač with other leading translation tools, highlighting its unique features and benefits.

Real-world Applications of Oprekladač

The versatility of Oprekladač allows it to be used in various settings, from personal communication to professional environments. This part explores different scenarios where Oprekladač can be a game-changer, including travel, international business, and education.

FAQs

Q: How accurate is Oprekladač?
A: Oprekladač uses state-of-the-art technology to ensure translations are as accurate as possible, considering context and idiomatic expressions.

Q: Is Oprekladač free to use?
A: Basic features are available for free, while advanced features may require a subscription.

Q: Can Oprekladač translate images and voice?
A: Yes, Oprekladač can translate text in images and voice inputs, making it versatile and user-friendly.

Q: How many languages does Oprekladač support?
A: Oprekladač supports multiple languages, with continuous updates adding more to its repertoire.

Q: Is Oprekladač secure?
A: Yes, user privacy and data security are top priorities, with robust measures in place to protect user information.

Conclusion

In the digital age, the ability to communicate across language barriers is more valuable than ever. Oprekladač represents a significant leap forward in translation technology, offering a blend of accuracy, efficiency, and ease of use that sets it apart from the competition. Whether for personal use, educational purposes, or business communication, Oprekladač is poised to become an indispensable tool in our increasingly interconnected world.

As language continues to evolve, so too will the tools we use to understand it. Oprekladač is at the forefront of this evolution, breaking down barriers and bringing people closer together, one translation at a time.

Continue Reading
Click to comment

Leave a Reply

Your email address will not be published. Required fields are marked *

Tech

Difference Between LED and LCD: Which Display Technology Is Better in 2025?

Published

on

By

Difference Between LED and LCD

📺 Introduction

In today’s digital world, choosing the right screen technology can make a big difference in your viewing experience. Whether you’re buying a new TV, monitor, or smartphone, you’ll likely come across two common display types: LED and LCD.

But what exactly is the difference between LED and LCD? And which one should you choose in 2025?

This article breaks it down in simple terms so you can make an informed, tech-savvy decision. We’ll also explore advanced display variations and key considerations to help you choose the right screen for your home, office, or gaming setup.


🔍 What is LCD?

LCD stands for Liquid Crystal Display. It uses liquid crystals sandwiched between two layers of glass or plastic and a backlight to produce images.

How it works:

  • Light from a fluorescent lamp (usually CCFL) passes through a polarizing layer.
  • Liquid crystals manipulate the light to form images.
  • A color filter adds color to the grayscale images formed by the crystals.

Key Features:

  • Requires fluorescent backlighting
  • Produces images by filtering light through liquid crystals
  • Commonly found in budget TVs, monitors, calculators, digital watches

Pros:

  • Low production costs
  • Good for general use
  • Energy efficient compared to older tech like CRT

Cons:

  • Weaker contrast and color accuracy
  • Slower response times
  • Less energy efficient than LED

💡 What is LED?

LED stands for Light Emitting Diode, and LED displays are a subset of LCD technology that uses LED backlights instead of CCFLs.

How it works:

  • A panel of white or RGB LEDs emits light behind or on the edge of the LCD panel.
  • Provides more precise lighting and dynamic contrast.

Types of LED Displays:

  • Edge-Lit LED: LEDs placed along the edges; allows for thinner displays.
  • Full-Array LED: LEDs placed evenly behind the panel for better contrast.
  • Mini-LED (2025 trend): Uses thousands of tiny LEDs for sharper brightness control.

Pros:

  • Slimmer designs
  • Higher brightness and contrast
  • Greater color accuracy and energy efficiency
  • Longer lifespan than standard LCDs

Cons:

  • Costlier than LCDs
  • Edge-lit models may have uneven lighting

🆚 LED vs LCD: Key Differences

Feature LCD LED
Backlighting CCFL (fluorescent) LED (light-emitting diode)
Brightness Moderate High
Energy Efficiency Medium High
Color Accuracy Average Better
Lifespan Shorter Longer
Viewing Angles Narrower Wider (especially IPS LEDs)
Cost Lower Slightly higher

Learn more about emerging display technologies and their applications at SpaceCoastDaily.co.uk


📱 Advanced Variants to Consider in 2025

🔹 QLED (Quantum Dot LED)

  • Developed by Samsung
  • Uses quantum dots to improve color range and brightness
  • Better than LED in terms of vibrancy

🔹 OLED (Organic LED)

  • Individual pixels emit light (no backlight needed)
  • Excellent black levels, contrast, and ultra-slim design
  • More expensive, used in high-end TVs and smartphones

🔹 Mini-LED

  • Offers better control over dimming zones
  • Reduces halo effects and improves dynamic range
  • Becoming mainstream in high-end monitors and TVs

These technologies often build upon LED panels, offering better performance at a higher price.


📊 Use Cases: Which One Is Better for You?

📺 For Watching TV

  • LED TVs are ideal due to better brightness, energy use, and sleek designs.
  • Go for Full-Array LED for optimal movie experience.

💻 For Office Work

  • LCD monitors are sufficient for word processing, browsing, and spreadsheets.
  • LED provides less eye strain over long periods — recommended.

🎮 For Gaming

  • LED monitors with high refresh rates and low response times are superior.
  • Avoid basic LCDs due to ghosting and lag.

📱 For Smartphones/Tablets

  • LED and OLED dominate the mobile space due to high-quality visuals and efficiency.

🧠 Final Thoughts

While LCD and LED both belong to the same display technology family, LED is significantly superior in most categories that matter to users today — including brightness, energy use, durability, and visual quality.

In 2025, unless you’re shopping on a very tight budget, LED should be your default choice. However, be aware of more advanced options like Mini-LED or OLED if your usage includes creative work, high-end gaming, or home cinema setups.

Looking for more tech comparisons and practical guides? Visit SpaceCoastDaily.co.uk for regularly updated articles and smart recommendations.


❓FAQ: LED vs LCD

Q1: Is LED better than LCD?
Yes. LED is generally better due to its superior brightness, contrast, and energy efficiency.

Q2: Do LED TVs last longer than LCD?
Yes, they tend to have longer lifespans and better reliability.

Q3: Are LED screens more expensive?
Slightly, but they offer better value over time.

Q4: Can I use an LCD monitor for gaming?
Yes, but modern LED monitors are much better suited for gaming due to faster refresh rates.

Q5: Is OLED the same as LED?
No. OLED is a different, more advanced technology that offers individually lit pixels and deeper blacks.

Q6: What is Mini-LED and should I consider it?
Mini-LED is a newer version of LED offering improved contrast and brightness. It’s ideal for professionals and enthusiasts.

Continue Reading

Tech

DIY Solar Panel Setup for Home: Save Energy & Money

Published

on

By

DIY Solar Panel Setup for Home

🌞 Introduction

Want to cut down your electricity bills and reduce your carbon footprint? A DIY solar panel setup for home might be the solution you’re looking for. With solar technology becoming more affordable and efficient, more homeowners are turning to solar power as a long-term investment in sustainability.

In this guide, we’ll break down everything you need to know about setting up a solar panel system yourself—from equipment selection to installation and maintenance. Whether you’re a total beginner or somewhat handy, you’ll walk away ready to go solar, save money, and take control of your home’s energy use.


⚡ Why Choose a DIY Solar Panel Setup for Home?

💰 Cost Savings

One of the biggest advantages of going DIY is saving on labor costs. Hiring professionals can cost thousands, while a DIY setup significantly lowers your total investment.

🌱 Environmental Impact

Solar power is clean and renewable. A typical home system can reduce 3 to 4 tons of carbon emissions annually.

💡 Energy Independence

Producing your own electricity reduces dependence on utility companies and protects you from rising energy prices.


🧰 What You Need for a DIY Solar Panel Setup

Before diving into the installation process, gather these key components:

1. Solar Panels

  • Choose monocrystalline for higher efficiency.

  • Polycrystalline is cheaper but slightly less efficient.

2. Inverter

  • Converts DC (from panels) into AC (for your home).

  • Types: String inverter, microinverters, hybrid inverters.

3. Charge Controller

  • Regulates voltage and current from panels to batteries.

  • Prevents battery overcharging.

4. Battery Bank (Optional but Recommended)

  • Stores excess power for use during night or outages.

  • Lithium-ion batteries are ideal but expensive.

5. Mounting System

  • Roof mounts or ground mounts, based on your space.

  • Ensure they’re durable and weather-resistant.

6. Wiring and Connectors

  • Solar-grade cables (MC4 connectors recommended).

  • Proper fuses and circuit breakers for safety.

7. Net Meter (Optional)

  • For grid-tied systems to earn credit on your power bill.


🛠️ Step-by-Step: How to Install DIY Solar Panels at Home

🔍 Step 1: Assess Your Energy Needs

  • Review your electricity bills (monthly kWh usage).

  • Decide whether to go off-grid, grid-tied, or hybrid.

📐 Step 2: Site Evaluation & Solar Access

  • Use tools like PVWatts or Google Project Sunroof.

  • Ensure your roof gets at least 5-6 hours of direct sunlight daily.

🧮 Step 3: Calculate System Size

  • Average home uses ~900 kWh/month.

  • A 5 kW system (~15-20 panels) usually covers this.

🛒 Step 4: Purchase Equipment

Buy from trusted suppliers with warranty options. For top-tier solutions, check out Circle Solar, a leader in sustainable solar energy solutions.

🔧 Step 5: Install Mounting & Panels

  • Attach the mounting system to your roof or ground.

  • Secure panels onto the racking system.

🔌 Step 6: Connect Electrical Components

  • Wire panels → charge controller → battery bank → inverter → home grid.

  • Ensure all safety disconnects and grounding are in place.

📋 Step 7: Inspection & Activation

  • Get local authority inspection if required.

  • Turn on the system and monitor output via your inverter app or meter.


🔄 Maintenance Tips for Long-Term Efficiency

  • Clean panels 2-3 times a year to remove dust and debris.

  • Check wiring annually for signs of wear or corrosion.

  • Monitor performance with apps or online dashboards.


🧠 Pro Tips for DIY Success

  • Start small: Begin with a portable or single-panel system if you’re new.

  • Take safety seriously: Wear protective gear and follow all electrical codes.

  • Consult your utility provider: Especially for grid-tied systems.


🌐 Real-World Success: Why People Are Going Solar

More and more UK residents are adopting DIY solar power to fight rising energy costs and embrace a sustainable lifestyle. Platforms like Space Coast Daily regularly feature success stories and resources on renewable energy—proving that the solar movement is thriving.


✅ Conclusion: Ready to Harness the Sun?

Installing a DIY solar panel setup for home is not just a trend—it’s a smart investment in your future. With the right tools, planning, and guidance, you can generate your own clean electricity and gain true energy independence.

So, are you ready to start your solar journey? Bookmark this guide, explore Space Coast Daily for the latest in sustainable energy trends, and consider checking out Circle Solar for premium components that last.


❓ FAQ: DIY Solar Panel Setup for Home

Q1: Is it legal to install solar panels myself?
A: Yes, in most regions, DIY installations are legal. However, check your local codes and permit requirements.

Q2: How much does a DIY solar system cost?
A: Expect to spend between £3,000 to £6,000, depending on system size and quality.

Q3: Can I run my entire house on solar?
A: Yes, with a properly sized system and battery backup, you can power your whole home.

Q4: How long do solar panels last?
A: Most panels come with a 25-year warranty and can last even longer with proper care.

Q5: Do I need batteries for my solar system?
A: Batteries are optional but useful for off-grid setups and backup during outages.

Continue Reading

Tech

What is Janitor AI? Features, Use Cases & How to Use It Safely in 2025

Published

on

By

What is Janitor AI?

📝 Introduction

Artificial intelligence is rapidly transforming how we interact online, and Janitor AI is one of the most buzzed-about names in the chatbot space—especially for users looking for customizable, conversational, and even NSFW AI interactions.

Whether you’re exploring it for entertainment, roleplay, or productivity, this guide covers everything you need to know about Janitor AI in 2025—from how it works, its features, limitations, and even the controversy surrounding it. If you’re curious, cautious, or ready to dive in, this is your ultimate reference.


🤖 What is Janitor AI?

Janitor AI is an advanced AI chatbot platform that allows users to interact with a variety of characters—ranging from anime-style bots to customizable virtual personalities. Unlike traditional AI chat tools, Janitor AI focuses heavily on character roleplay, storytelling, and human-like interaction.

Many users have been drawn to the platform due to its allowance (at times) for NSFW (Not Safe For Work) conversations, making it popular among adult users. However, its capabilities extend beyond that.

🔹 Key Features:

  • Character-based AI chats (custom bots)

  • NSFW and SFW modes (optional)

  • GPT-based responses (OpenAI or Kobold API supported)

  • Voice synthesis (in some versions)

  • Public character library


📌 Janitor AI Use Cases in 2025

Despite the controversy, Janitor AI is being used for several legitimate and interesting purposes:

1. Roleplay & Storytelling

Writers and fans use the platform for:

  • World-building

  • Character interaction testing

  • Generating dialogues for scripts and comics

2. Entertainment & Fun

  • Anime fan chats

  • Simulated romantic convos

  • Gaming companion bots

3. Mental Health & Venting

Some users engage with soft-spoken bots to:

  • Simulate therapy

  • Talk out problems

  • Seek non-judgmental conversation

4. Productivity Simulation

  • Practice job interviews

  • Language learning through simulated chats

  • Train customer service interactions


🛠️ How Janitor AI Works

Janitor AI is not powered by its own LLM (Large Language Model). Instead, it connects with external APIs like:

  • OpenAI (ChatGPT) – for safe, filtered interactions

  • KoboldAI or Pygmalion – for unfiltered/NSFW content

  • Local Models (e.g., SillyTavern) – for privacy-focused chats

To use Janitor AI:

  1. Sign up and login at [janitorai.com] [EXTERNAL LINK]

  2. Choose a character from the public library or create your own.

  3. Connect an API key (OpenAI or KoboldAI).

  4. Start chatting with the bot of your choice.

⚠️ Note: You must configure API settings correctly. Many users get errors if APIs are not linked.


🚫 NSFW & Content Safety: The Big Debate

One of the reasons Janitor AI became viral is because it allowed NSFW chats, especially using Pygmalion or OpenRouter APIs.

However, this has sparked massive debates online, especially around:

  • AI ethics

  • Age restrictions

  • Content moderation

In 2024-2025, Janitor AI removed direct NSFW support on its main platform, but users still bypass this using external APIs or local installations.

🔒 Tips for Safe Use:

  • Use a local model if privacy is a concern.

  • Never share real personal data.

  • Check if the bot creator has moderation settings enabled.

  • Keep SFW mode on if under 18 or in public/shared devices.


📈 Why Janitor AI is So Popular in 2025

Reason Description
Customizable Bots Create your own characters with unique personalities
Roleplay Freedom Many bots simulate romantic or fantasy dialogues
Easy to Use No coding needed, simple UI
Cross-Platform Use in browser, Discord bots, or third-party apps
Large Community Public bots, shared prompts, guides available

🔄 Janitor AI Alternatives (2025)

If Janitor AI doesn’t suit your needs, here are some trending alternatives:

1. Character.AI

  • Family-friendly

  • No NSFW content

  • Great UI & mobile app

2. Chai App

  • Available on Android & iOS

  • Tons of user-generated bots

  • Less control over filtering

3. Pygmalion AI + SillyTavern

  • Fully unfiltered

  • Requires setup

  • Works offline with local LLMs

4. OpenAI Playground (ChatGPT)

  • Reliable for clean conversations

  • Limited in roleplay compared to Janitor

📌 For a comparison article, see: [Janitor AI vs Character AI – Which is Better?] [INTERNAL LINK]


💻 Developer & Community Tools

If you’re a developer or enthusiast, Janitor AI allows:

  • Bot creation: Customize prompts, memories, behavior.

  • API linking: Choose your preferred backend model.

  • Community uploads: Share your bot with others.

  • Third-party mods: Chrome extensions, Discord integrations

Some devs even run private versions of Janitor AI using open-source tools like:

  • JanitorAI-Local

  • Sillytavern UI

  • KoboldCPP


✅ Pros and Cons

Pros Cons
Deep roleplay capabilities May violate ethical/age guidelines
Supports multiple AI backends Complex setup for unfiltered APIs
Active community & support NSFW misuse concerns
Free to use (with API) Not beginner-friendly without guides

📌 Conclusion (with Links Added)

Janitor AI is much more than just another chatbot it’s a powerful, flexible platform for those looking to dive into immersive conversations with fictional, realistic, or AI-generated characters. Whether you’re writing a fantasy novel, simulating a companion, or just killing time, it opens up countless possibilities.

But with great flexibility comes responsibility. Use Janitor AI ethically, protect your privacy, and respect the boundaries of content guidelines.

Want to explore more ways to leverage AI? Check out our guide on
👉 How to Make Money with ChatGPT in 2025 – 10 Proven Methods

Or visit our homepage for more trending AI tools, tech updates, and tutorials:
🌐 SpaceCoastDaily.co.uk


❓ FAQ – Janitor AI 2025

Q1: Is Janitor AI free to use?

Yes, the platform is free, but you’ll need to connect your own API key (like OpenAI, Kobold, or Pygmalion).

Q2: Is NSFW content still available?

Officially, NSFW content is restricted. However, users can still access it via third-party APIs or local setups.

Q3: Is Janitor AI safe?

It’s generally safe if you use trusted APIs and don’t share personal info. For NSFW use, caution is advised.

Q4: Can I use it without coding?

Yes, Janitor AI has a user-friendly interface. You only need to copy-paste API keys.

Q5: What is the best API for Janitor AI?

For filtered, ethical use: OpenAI. For unfiltered creative freedom: KoboldAI or Pygmalion.

Continue Reading

Trending